Cleaning up Adobe Captivate’s SCORM Publishing Template, Part 5: Finishing up

In part one of this series, we published a simple Captivate course and examined its file structure. In part two, we cleaned up the HTML file and externalized all JavaScript. In part three, we cleaned up the JavaScript. In part four, we updated the SCORM code. In this installment, we will put the finishing touches on our code and move our files into Captivate’s publishing folder.
In the first four parts of this series, we were working with actual course files; these files need to be converted into template files. Once they’re set up as templates, you can just pop them into your Captivate templates folder and never worry about it again.
Let’s take a quick look at Captivate’s template folder structure:
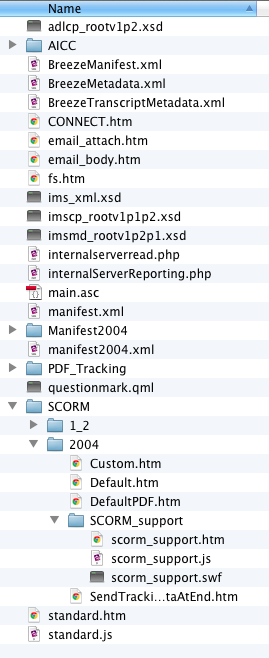
I’m on a Mac, but the folder structure is the same on a Windows machine.
Our files were gathered from several locations:
- The Manifest2004 folder contains all of the SCORM 2004 XSD files. We don’t need to edit any of these files.
- The manifest2004.xml file is the SCORM 2004 imsmanifest.xml template. We don’t need to edit this file, though there are improvements that can be made.
- The SCORM folder contains a 2004 subfolder, which in turn contains most of the HTML and JavaScript files we’ll need to edit.
- The standard.js file contains the SWFObject 1.5 library.
Cleanup task #1: Refactor the code to eliminate the captivate.js file
In part two of this series we externalized JavaScript by creating a new file named captivate.js. This was useful while we refactored code, because it helped separate JavaScript from HTML and gave us a clearer picture of what we needed to work on. However, now that we’re trying to insert our edits into a Captivate publishing template, were stuck with the limitations of Captivate’s template and cannot add new files to the template — we can only edit existing files. We will therefore need to make a choice: where shall we place the contents of our new captivate.js file? In the HTML file, in scorm_support.js, or in standard.js?
There’s an easy answer: the HTML file.
Yes, this goes counter to my previous argument about externalizing the JavaScript, but we’re given little choice. The standard.js file is shared with 12 other templates; if you plan to use any of the other templates that ship with Captivate, we’ll need to leave this file alone (yes, that means leaving the SWFObject 1.5 library in your course even though we won’t be using it! Thankfully it has a very small footprint.).
scorm_support.js is a decent place to put our scripts, but it has one huge drawback: Captivate will not write anything to this file when publishing… and therein lies the problem!
When publishing a Captivate project using the SCORM 2004 template, the filename and dimensions are written to the HTML file (SCORM2004Default.htm). In fact, Default.htm is also renamed to match your project’s name. scorm_support.js and standard.js are never touched by Captivate; they are static files. In order for our modified template to work, we have to enable Captivate to write project details (project dimensions, filename, colors, etc.) to the HTML file.
The good news is that we significantly cleaned up the JavaScript, so captivate.js only contains a tiny amount of code.
Here are the modified HTML and scorm_support.js files after we get rid of captivate.js. There is much work to be done.
Cleanup task #2: Create a configuration object
Web apps normally use configuration objects — objects that contain data about how the app works. Since we know Captivate will write project details in the HTML, it makes sense to create a ‘config’ object.
Technically we could just use global variables, but an object dedicated to configuration information is a very clean way of working.
var CONFIG = {

};
So… what shall we put into this CONFIG object? Let’s start by looking in Default.htm to see what Captivate makes available to us. Anything prefixed with @ is a variable that gets written to the page by Captivate during the publishing process. A quick scan through the page reveals the following:
- @MOVIETITLE (used in the HTML title element)
- @MOVIENAME (the SWF filepath)
- @IsRightClickFunctionalityRequired (an attribute placed in the HTML body element)
- @SKINCOLOR (an attribute placed in the HTML body element)
- @FlashPlayerVersion
- @MOVIEWIDTH
- @MOVIEHEIGHT
- @WMODEVALUE (specifies what wmode should be used by Flash Player)
The whole IsRightClickFunctionalityRequired thing is problematic, we’ll get back to that later.
Here’s what we can put into our CONFIG object. I’m renaming a few of them for clarity and/or simplicity:
var CONFIG = {
    MOVIETITLE: "@MOVIETITLE",
    FILEPATH: "@MOVIENAME",
    BGCOLOR: "@SKINCOLOR",
    FPVERSION: "@FlashPlayerVersion",
    WIDTH: "@MOVIEWIDTH",
    HEIGHT: "@MOVIEHEIGHT",
    WMODE: "@WMODEVALUE"
};
We should also specify the name of the element that SWFObject will use to embed the SWF. Captivate normally names this file “CaptivateContent”, but it would be good to list it in the CONFIG object in case we ever need to edit it. (Spoiler: we will be editing it later.)
If you recall, we also have an if/else clause that displays a message to the learner if the SCORM API fails to load. We should place that message in our CONFIG object as well. This way you can quickly and easily reconfigure the message to suit your needs without digging through all of the template files.
var CONFIG = {
    TITLE: "@MOVIETITLE",
    FILEPATH: "@MOVIENAME",
    BGCOLOR: "@SKINCOLOR",
    FPVERSION: "@FlashPlayerVersion",
    WIDTH: "@MOVIEWIDTH",
    HEIGHT: "@MOVIEHEIGHT",
    WMODE: "@WMODEVALUE",
    TARGET: "CaptivateContent",
    NOSCORM: "Sorry, but the course is not available at this time (SCORM API not found). Please try again. If you continue to encounter problems, please contact the course administrator."
};
Cleanup task #3: Refactor the code using the CONFIG object
Now that our CONFIG object is ready to go, we need to replace all of the hard-coded values from our sample course with these configuration items. (Make a backup copy first!)
While we’re at it, we’ll place @MOVIETITLE into the title element, and @SKINCOLOR into our style element. Because of a quirk of the Captivate system, @SKINCOLOR can’t be followed by a semicolon in the CSS.
This will fail (semicolon after SKINCOLOR):
body { background: @SKINCOLOR; text-align: center; }This will work (no semicolon):
body { text-align: center; background: @SKINCOLOR }This configuration object enables us to move all other JavaScript out of the HTML and into scorm_support.js; the only JavaScript remaining on the HTML page are user-defined configuration items. Way cool. We have to be careful to reorder the script elements, so that the CONFIG object is created before scorm_support .js loads.
Cleanup task #4: Tidy up the HTML file a bit more
There are a few items that need attention in the HTML.
1. Quirks mode. Adobe placed two HTML comments above the doctype, which will trigger Internet Explorer to display the page in quirks mode. Since our page layout is so simple, quirks mode shouldn’t affect us, but it’s still a good practice to avoid placing comments above the doctype.
Current code:
<!-- Copyright [2008] Adobe Systems Incorporated.  All rights reserved -->
<!-- saved from url=(0013)about:internet -->
 ```

Before we move the comments, let’s stop and ask: are these comments even necessary? Are they useful? Well, the first comment is an Adobe copyright notice, which is questionable at best. What, exactly, is being copyrighted? The content of the page? Does that include your Captivate handiwork? Is the HTML being copyrighted? I’m not a lawyer, but I’m pretty sure you can’t copyright HTML markup. There is no clarity. Since I’ve competely obliterated what was provided by Adobe, anyway, I’m going to remove the copyright notice. Feel free to put it back if it makes you nervous, just place it \*under\* the doctype.

The second comment is what’s affectionately called “[the mark of the web](http://msdn.microsoft.com/en-us/library/ms537628\(v=vs.85\).aspx)” (MOTW). Another reason to thank Microsoft. The short explanation is that MOTW enables you to view your Captivate file locally in Internet Explorer by forcing Internet Explorer to treat the page as if it were loading from the internet instead of your hard drive. If you intend to do any local testing with Internet Explorer, you should keep the MOTW in your template. I’m going to cut and paste the version recommended by Microsoft:

```html
<!-- saved from url=(0014)about:internet -->
2. Remove page margins and padding. By default, all HTML pages have padding around the edges of the document, as well as a slight margin. Let’s remove all padding and margins to ensure the SWF comes up to the edge of the browser window. This will remove unsightly gaps when launching the course in the LMS’s popup window.
* { margin: 0; padding: 0; }You may be asking: “What happens if the window is bigger than the SWF?” Currently, the SWF will be aligned to the top left corner. Centering the SWF is tricky, we’ll come back to that later.
3. Place the noscript block inside CaptivateContent. This isn’t necessary, but it’s a clean way of working. SWFObject will replace fallback content — content that only displays if something isn’t supported, such as JavaScript or Flash Player — with the SWF upon successful embed, leaving just the bare minimum markup in the HTML.
HTML before embed:
<div id="CaptivateContent"><noscript>
      This course requires JavaScript to be enabled in your browser. Please enable JavaScript, then relaunch the course.
      </noscript></div>
HTML after embed:
<div id="CaptivateContent"></div>Cleanup task #5: Fix the right-click issue
As I mentioned earlier, Captivate has a variable named @IsRightClickFunctionalityRequired. This variable is located in the opening body tag.
If the Captivate SWF requires right-click functionality at any point, @IsRightClickFunctionalityRequired will add an onload event to the body element.
This is problematic for many reasons. First of all, adding an onload event directly to the body is considered a bad practice; inline JavaScript should be avoided whenever possible. It’s also a bad idea because the onload event is likely to overrule any window.onload events we might have in the external JavaScript.
After digging further into the IsRightClickFunctionalityRequired system, I have two additional concerns:
- Using this right-click functionality requires disabling accessibility in the Captivate preferences.
- The codebase for this functionality comes from a project named RightClick for Flash Player. It was developed before SWFObject 2.x existed, and therefore requires SWFObject 1.5 unless we make some modifications to our code.
Regarding the first concern, unfortunately, there’s nothing we can do about this in the template. It’s a choice you’ll need to make when authoring your Capivate projects. If you don’t like disabling Captivate’s accessibility features, please let Adobe know.
To understand the second concern, I must quickly explain a key difference bewteen SWFObject 1.x and SWFObject 2.x:
In SWFObject 1.5 — the version being used by Captivate — the SWF gets embedded inside the element you specify.
var so = new SWFObject("mymovie.swf", "Captivate", "550", "400", "10", "#CCCCCC");
//options here
so.write("CaptivateContent");
SWFObject 2.x changes this behavior. It replaces the target element, taking the ID of the element it replaces, unless a new ID is specified in the attributes object.
SWFObject JavaScript:
//SWFObject optional variables
var flashvars = {};
var params = {};
var attributes = { id: "Captivate" };
var callback = function (){ };

swfobject.embedSWF("mymovie.swf",
                   "CaptivateContent",
                   "550",
                   "400",
                   "10",
                   false,
                   flashvars,
                   params,
                   attributes,
                   callback);
To summarize: SWFObject 1.5 embeds the SWF inside your element, leaving the original element as a wrapper around your SWF, while SWFObject 2.x replaces the original element, leaving no wrapper.
The RightClick for Flash Player codebase requires the SWF to be located inside a wrapper element.
Normally, I’d edit the RightClick for Flash Player codebase to work with SWFObject 2. Unfortunately for me, it’s located in standard.js, which is used by all 13 Captivate publishing templates; if I update the code there, I’d need to replace ALL Captivate publishing templates. Not interested!
The solution is to write a function that creates a new wrapper div in our template before SWFObject is invoked. Of course, we only want to create this extra wrapper if right-click functionality is required.
Add a “rightClickRequired” property to our CONFIG object and populate it with the output of Captivate’s @IsRightClickFunctionalityRequired:
CONFIG.RIGHTCLICKENABLED = '@IsRightClickFunctionalityRequired';When right-click functionality is required, Captivate will populate CONFIG.RIGHTCLICKENABLED for us:
//Note the use of single quotes
CONFIG.RIGHTCLICKENABLED = 'onload="RightClick.init();"  ';
When right-click functionality is not required, CONFIG.RIGHTCLICKENABLED will contain an empty string.
All we need to do is check to see if CONFIG.RIGHTCLICKENABLED is an empty string; if yes, create a wrapper div, embed the SWF, then initialize the right-click codebase. If no, just embed the SWF as usual.
Cleanup task #6: Center the SWF
Oh boy, this one is rough. Centering an element should be achievable through CSS alone, but unfortunately, we have some crazy restrictions and exceptions to deal with.
If you know the dimensions of the element, it’s easy to center it. We know the dimensions of our SWF — it’s provided via @MOVIEWIDTH and @MOVIEHEIGHT — so we’re on easy street, right? Wrong.
As I mentioned earlier when discussing the CSS code for the body background color, Captivate will not write a variable to the page if the variable name is adjoining any other text.
Consider the following CSS:
#Captivate { width: @MOVIEWIDTHpx; height: @MOVIEHEIGHTpx; }It fails because “px” can’t be adjoining the @MOVIEWIDTH variable. Unfortunately CSS doesn’t allow us to place a space between the number value and the unit type. Assume @MOVIEWIDTH outputs 550 and @MOVIEHEIGHT outputs 400; if a space is provided between the value and the unit, the code is invalid and will fail:
#Captivate { width: 550 px; height: 400 px; }Captivate is forcing us to use JavaScript to write the CSS values. Uuuuuugly, but there’s no getting around it.
Normally, if you’d like to center an element horizontally, you can just define the width (which we’ll have to do with JS), then set margin as follows:
#Captivate { display: block; margin: 0 auto; }But to center an element vertically, we have more hoops to jump through, and it prevents us from being able to use the margin: 0 auto approach for horizontal centering. While there are some nice simple technquies out there for new browsers, they fail in older browsers. Most older sites use tables for layout because tables provides an easy and quick way to vertically center an element. But if you’ve read this entire series of posts, you can guess we’re not going to use tables — tables shouldn’t be used for layout! Period.
The most reliable CSS method is to use absolute positioning. This requires knowing the dimensions of the element, so we’ll be using a combination of CSS and JavaScript.
Added to the SWFObject callback function:
//Fix the centering for the SWF
CaptivateSWF.style.marginTop = "-" +(CONFIG.HEIGHT / 2) +"px";
CaptivateSWF.style.marginLeft = "-" +(CONFIG.WIDTH / 2) +"px";
Added to the HTML page’s CSS:
/* JavaScript is used to set pixel values for margin-left and margin-top */
#Captivate { position: absolute; top: 50%; left: 50%; }
We also set the height of body to 100%. Height is inherited from a parent element, so setting 50% height on an element won’t work in some browsers until you specify the parent element’s height.
Cleanup task #7: Final massaging!
We’ve done just about everything we can. The last step is to see if we can clean up our code to make it more tidy (and readable), then run it through some syntax checkers to look for bugs. I suggest JSHint.com, a fork of JSLint that doesn’t aim to hurt your feelings.
One change I’ll make is refactoring my CONFIG object to make it easier to read. While I prefer the original syntax (it compresses better, too), many n00bs prefer the more verbose style because they find it less confusing.
var CONFIG = {},
    flashvars = {},
    params = {},
    attributes = {};

CONFIG.TITLE = "@MOVIETITLE";
CONFIG.FILEPATH = "@MOVIENAME";
CONFIG.BGCOLOR = "@SKINCOLOR";
CONFIG.FPVERSION = "@FlashPlayerVersion";
CONFIG.WIDTH = "@MOVIEWIDTH";
CONFIG.HEIGHT = "@MOVIEHEIGHT";
CONFIG.WMODE = "@WMODEVALUE";
CONFIG.RIGHTCLICKENABLED = '@IsRightClickFunctionalityRequired';
CONFIG.TARGET = "Captivate";
CONFIG.NOSCORM = "Sorry, but the course is not available at this time (SCORM API not found). Please try again. If you continue to encounter problems, please contact the course administrator.";

//For SWFObject
params.bgcolor = CONFIG.BGCOLOR;
params.menu = "false";
attributes.name = CONFIG.TARGET;
While I’m cleaning, I’ll reduce the number of vars I introduced into scorm_support.js when adding new functions. This is also where we can do nitpicky stuff like replacing tabs with spaces and ensuring we have semicolons in the right places. Be sure to remove any alerts or console.log calls you may have added for debugging.
I think I’ll make one other change — add SWFObject 2.2 to standard.js. Yes, this means standard.js will contain both SWFObject 1.5 and 2.2, which is a bit odd. However it seems like a safe choice, since some institutions might not like loading SWFObject from a 3rd party CDN such as Google.
I’m also going to compress RightClick in standard.js to reduce file size. Be sure to make a backup copy if you’re following along.
Cleanup task #8: Move the files into the Captivate publishing folder
It’s been a long road, but we’re finally ready to make the jump! Let’s replace the existing template files.
You can grab the new code here.
First, make a backup of your entire publishing folder and put it somewhere safe!
Next, rename your HTML file to Default.htm and drag it into TemplatesPublishSCORM2004 (Original file was 11.8KB, new file is 1.7KB)
Now copy your scorm_support.js file to TemplatesPublishSCORM2004SCORM_support replacing the original file. (Original file was 6.7KB, new file is 7.4KB)
While you’re in your SCORM_support folder, go ahead and delete scorm_support.htm (590B) and scorm_support.swf (149B) — they won’t be used anymore.
Update: If you choose to delete these two files, you must edit Manifest2004.xml to reflect the change. Just remove the two lines that mention scorm_support.htm and scorm_support.swf (found at about line 108 in Manifest2004.xml).
Finally, go to TemplatesPublish and replace standard.js with our updated copy. (Original file was 10KB, new file is 19KB)
Sweet: Even after adding SWFObject 2.2 to standard.js, we were able to shave about 1KB from the total file size! (29.25KB to 28.1KB)
Now restart Captivate and give it a try!
The next installment of the series will provide a quick summary as well as some additional options and considerations. Go to Part 6.
Comments
Rod Ward wrote on January 18, 2012 at 6:23 am:
Pip, This is fantastic work and I think I speak for all Captivate developers in giving you our heartfelt thanks for doing this and giving it back to the community. One thing I would like to ask: Now that I've replaced my old templates with your revamped ones, when I publish to SCORM 2004 I'm prevented from being able to view my published files unless I upload them to an LMS. All I get is a message saying that the course is unavailable because it cannot find a SCORM API. This means I have to turn off SCORM reporting in Captivate when I'm developing and then remember to turn it on again when I'm ready to do my final publish and upload. Is there perhaps any way to build an option into the code (maybe a keystroke activated bypass) that would allow me to leave my settings on for SCORM 2004 and still be able to test output locally without an LMS? Regards, Rod
philip wrote on January 18, 2012 at 9:27 am:
yup, will be covering that and a few other tweaks in the next post